Importance of Earthworms in Agriculture
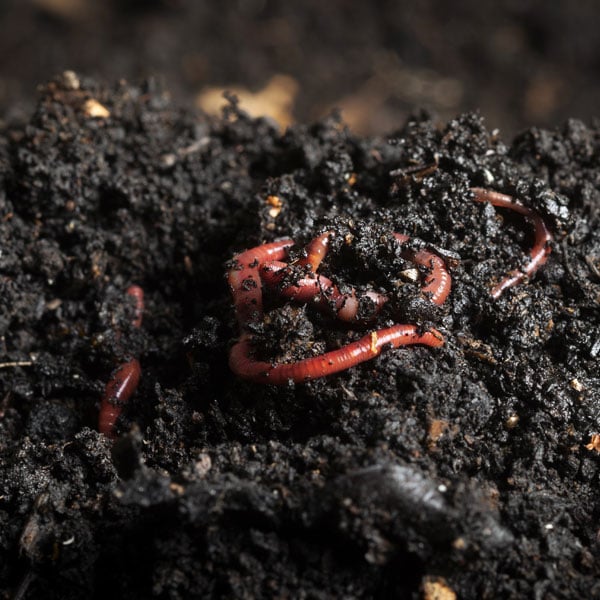
To ensure the vitality of soil for agriculture, it is essential to have soil teeming with life, specifically earthworms and microorganisms. Earthworms play a crucial role in maintaining soil fertility. They consume decaying plant material and excrete nutrient-rich waste that serves as excellent fertilizer for crops.
This vermicompost is rich in organic matter and beneficial microorganisms, which enhances soil health and fertility. Therefore, earthworms are often referred to as the “intestines of the earth” for their significant role in soil ecosystems.
Suitable Earthworms for Vermicomposting
While there are many types of earthworms, only those that live on the soil surface are suitable for vermicompost production. These worms feed exclusively on organic waste and convert it into compost. The selection criteria include their ability to consume organic waste, rapid growth, reproductive capacity, and resilience to environmental changes. Suitable species include:
- Eudrilus eugeniae
- Perionyx excavatus
- Eisenia fetida
- Lampito mauritii
Suitable Waste Materials for Vermicomposting
Various organic wastes are suitable for vermicomposting, such as:
- Sugarcane trash
- Banana stalks
- Corn stover
- Straw
- Coconut coir waste
- Legume residues
- Vegetable waste
- Fallen leaves
- Mushroom cultivation waste
- Silk industry waste
- Tough weeds like Parthenium, water hyacinth, wild indigo, grass, and leafy weeds
These materials should be cut into small pieces (about 5 cm) and dried in the shade to maintain 20-40% moisture. Additionally, animal manures like cow dung, poultry manure, goat manure, horse manure, pig manure, and biogas slurry should be collected and dried.
Preparing Feed Mixture
Mixing crop residues and animal manures can create suitable feed mixtures for earthworms. The following mixtures have been found effective:
- One-week decomposed biogas slurry
- Equal parts of cow manure, goat manure, and horse manure
- 10:3 ratio of cow manure to crop residues
- 10:3 ratio of goat manure to crop residues
- 5:5:3 ratio of poultry manure, goat manure, and crop residues
- Equal parts of goat manure, poultry manure, and pig manure
- 10:3 ratio of cow manure to vegetable waste
These mixtures should be heaped or placed in pits, moistened, and allowed to decompose for 2-3 weeks before being fed to the earthworms.
Compost Production Methods
Heap Method
- Prepare the Site: Choose a shaded area and create a raised platform with dimensions of one square meter.
- Layering: Spread a 2-3 cm layer of sand, followed by a 5 cm layer of soil from the earthworm collection site.
- Adding Waste: Add a 9-12 inch layer of mixed farmyard manure (like cow dung, biogas slurry, goat manure, or poultry manure). Follow with a layer of shredded crop residues or vegetable waste of the same thickness.
- Moisture Maintenance: Maintain 60% moisture by sprinkling water.
- Turning: After a week, turn the layers to mix the materials and release heat.
- Adding Earthworms: Once the mixture turns light brown or dark brown, add the earthworms. The worms will consume the decomposed material and excrete it as vermicompost.
Pit Method
- Digging the Pit: Create a pit in a shaded area or near a cattle shed. The pit should be 10 feet long, 3 feet wide, and 3 feet deep.
- Lining the Pit: Line the sides and bottom of the pit with a plastic sheet to prevent worms from escaping into the soil.
- Adding Layers: Add a 2-3 cm layer of sand at the bottom for drainage, followed by a 5 cm layer of soil.
- Feeding Earthworms: Add decomposed feed mixture and introduce the earthworms. Continue adding layers of feed mixture and worms until the pit is almost full, leaving the top 5 cm empty.
- Moisture Maintenance: Maintain 60% moisture by sprinkling water daily.
- Harvesting Vermicompost: After 2-3 weeks, the worms will start excreting vermicompost, which can be collected from the surface.
Collecting Vermicompost
Stop watering the heap or pit two days before harvesting. Earthworms will move to the lower layers, allowing easy collection of vermicompost. The collected worms and egg capsules can be reused for further composting.
Silpaulin Bag Method
- Site Selection: Choose a site with no water stagnation and ensure the ground is firm and level. Preferably, place the setup under shade or a tree to protect from sun and rain.
- Setting Up the Bag: Use 250 GSM silpaulin bags measuring 12x4x2 feet. Secure the bags with wooden poles (13 feet long and 5 feet high) and nylon ropes to keep them firm.
- Drainage: Ensure proper drainage by placing sand at the bottom of the pit under the bag.
- Filling the Bag: Start with a half-foot layer of coconut coir at the bottom of the bag. Moisten it adequately. Add decomposed organic matter and manure, removing any non-decomposable materials like stones or plastic.
- Moisture Maintenance: Keep the setup covered with a shade net to protect from birds and maintain 60% moisture by sprinkling water.
- Harvesting: After 2-3 weeks, collect the vermicompost from the surface, as the earthworms will have moved to the bottom layers.
Conclusion
Vermicomposting can significantly enhance soil fertility and reduce the cost of chemical fertilizers. By integrating vermicompost production with traditional farming practices, farmers can improve their yield, increase their income, and maintain sustainable agricultural practices.
Dr. K. Sudhakar, S. David, Dr. E. Murugan, Agricultural Research Center, Kovilpatti

